Dwelling Envy Interiors

How To Create “Amber Interior’s” Inspired Centerpiece
by KRISTIN PATRICIAN

by KRISTIN PATRICIAN

Author, Owner & Principal Designer of
Dwelling Envy Interiors

Date

As the Fall Season has official descended upon us, we’ve been joyfully busy redecorating our home in preparation for the cooler weather.  

Of course, every season, all our favorite designers and retail stores give us “all the feels” with their Fall Launches.  Making it super hard to resist all their pricey new Must Haves.

And if we’re being honest, sometimes we don’t want to spend the cash when we can get creative instead.  

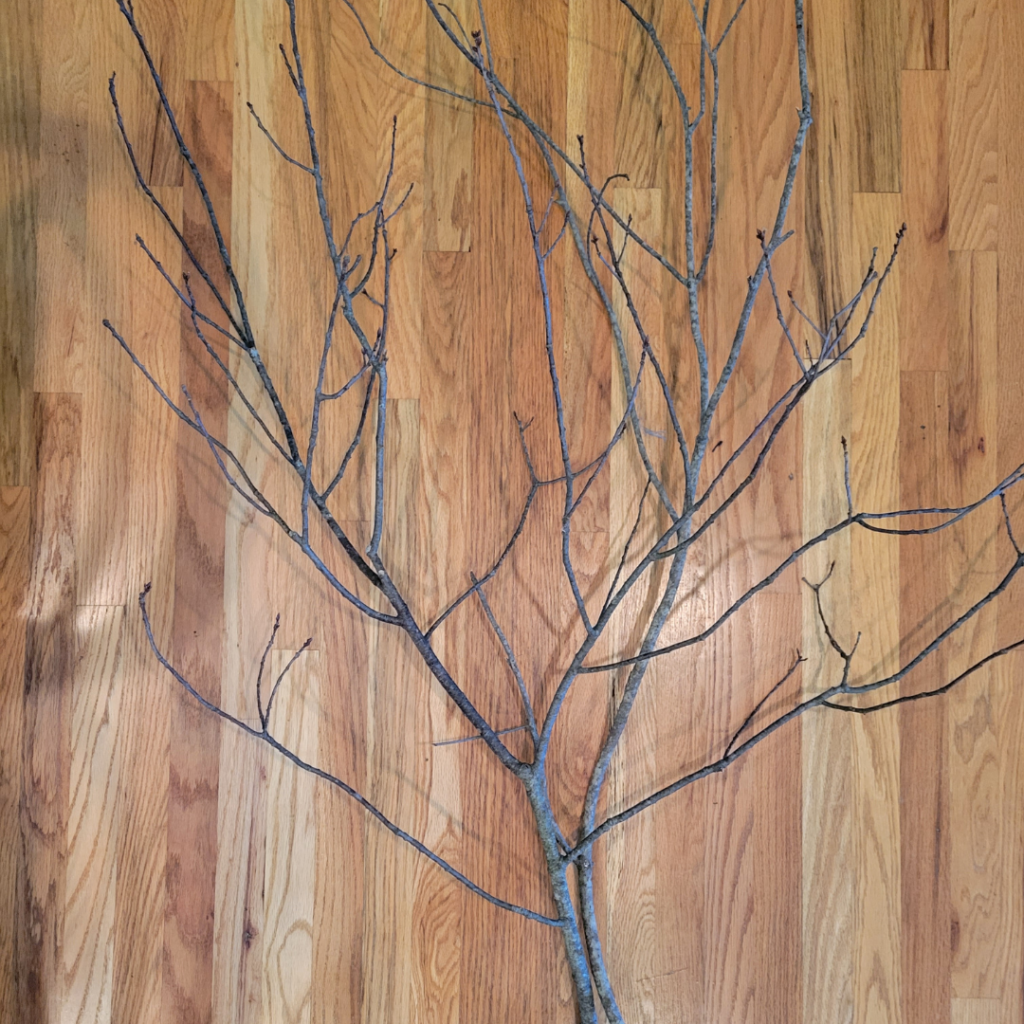
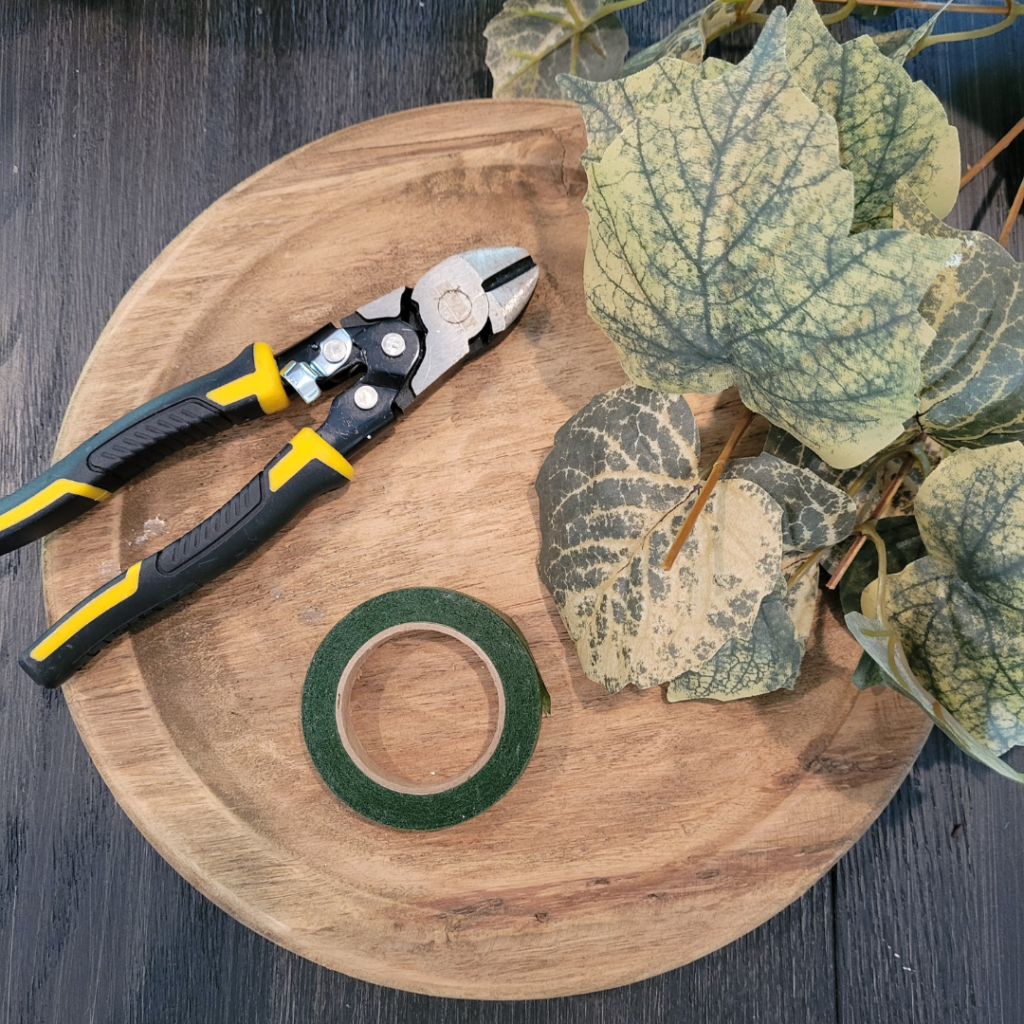
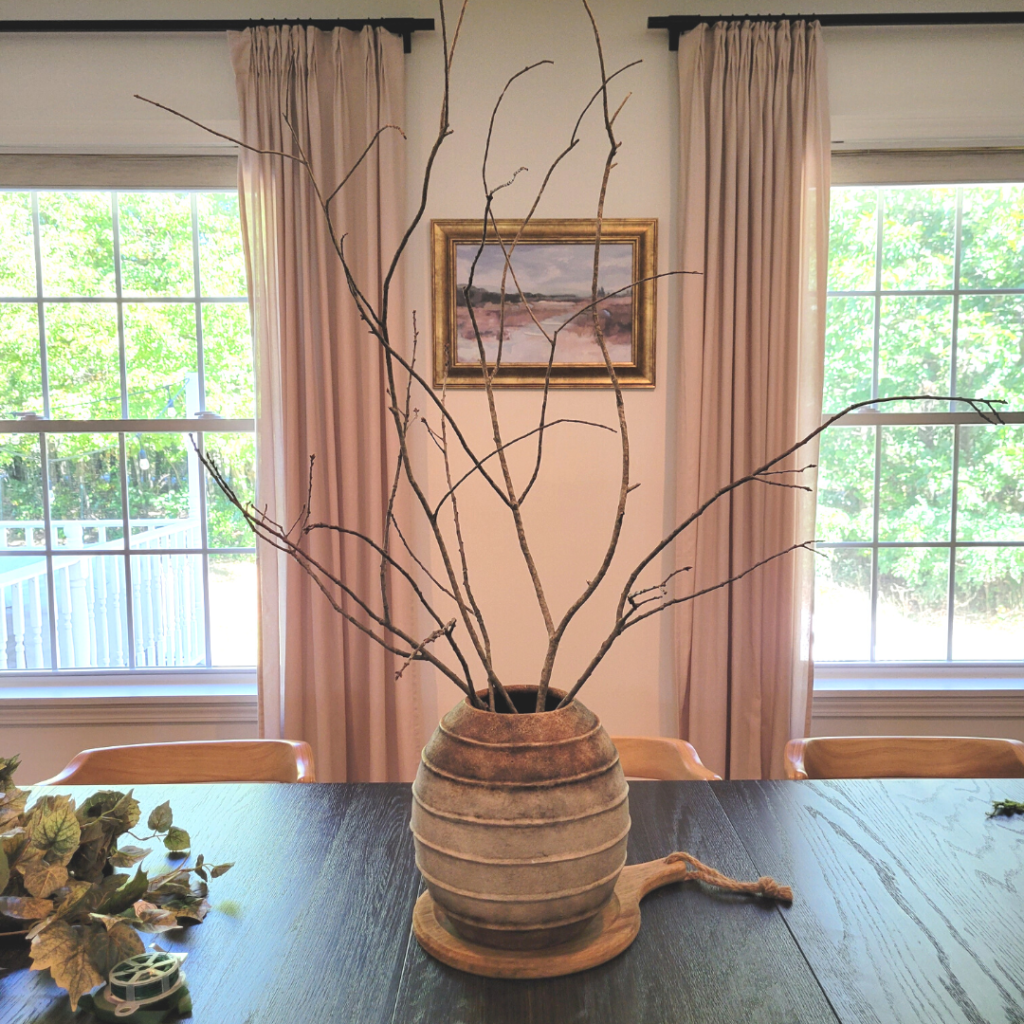
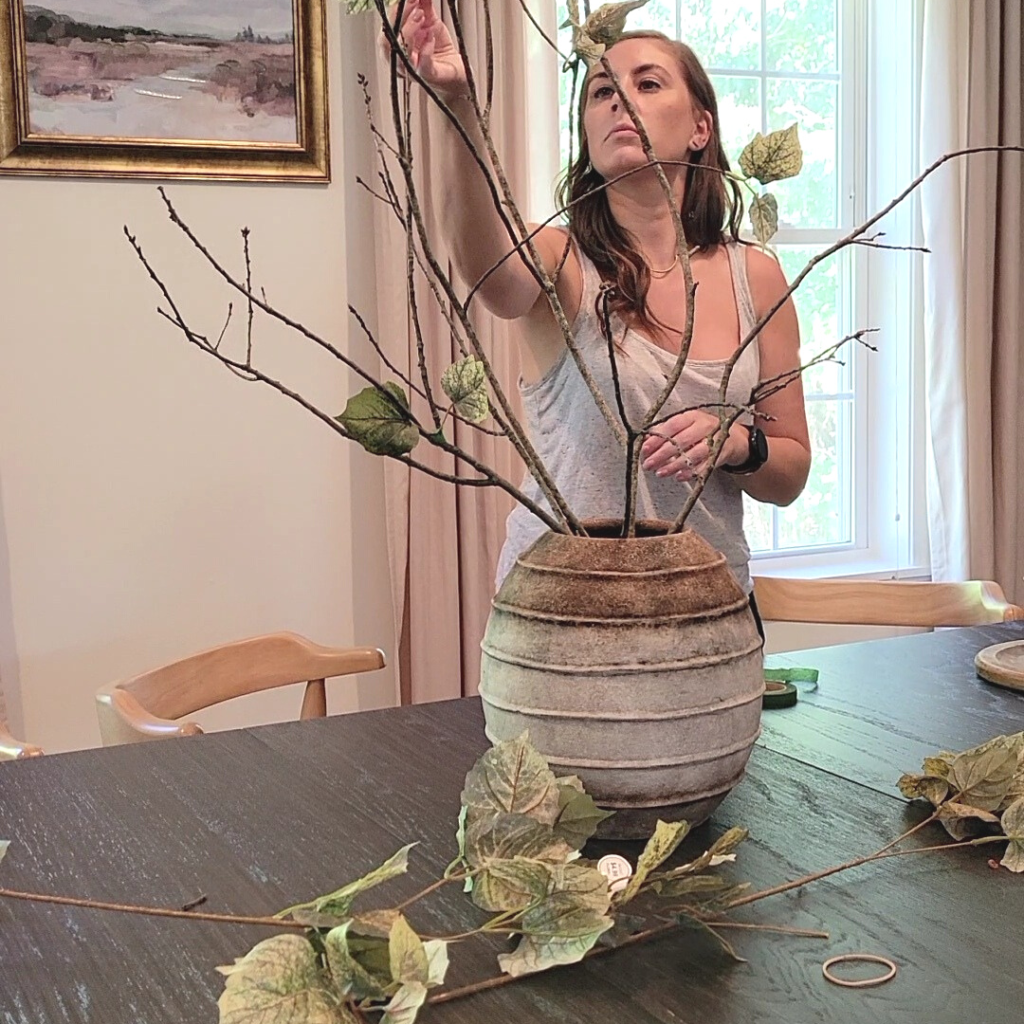
So with our mind on our wallet, we decided to try our hand at making an eye-caching centerpiece using leftover materials around our home Spending only $12 on greenery purchased at Hobby Lobby, and less than 2 hours of our time, we created a Budget Luxury Centerpiece that is “Amber Interiors Vibe Approved.”

Continue Reading to learn how we created ours, and how easy you can make one too!

MATERIALS WE USED

First things first, here are the materials we used to create our DIY Fall Centerpiece

– Wire Cutters (or something similar to cut branches & faux stem wire)

– Floral Tape 

– Realistic Looking Faux Greenery (we found ours at Hobby Lobby 50% off)

– Favorite Vase

– Small Branches – We Used Leftovers from our DIY Artificial Tree Project.

– Paints (we used acrylic) in colors: Brown, White, Black & Green

– Small Art Brushes

– Paint Palette , but you can use Wax Paper or anything else that will allow you to mix your paints together ( we used Paint Palette Paper – which we love because its easy cleanup!)

WHERE TO START

We started out by repurposing some leftover branches we before foraged from our yard from our previous project – DIY Artificial Tree. It was important for us to keep some height to the branches to create a dramatic look for our dining table. But, we did take some time to trim down some of the branches.
 

For yourself, you can absolutely trim down a bit, add or remove, there’s no RIGHT or WRONG way to go about this, as long as you’re have fun!

HOW TO ARRANGE YOUR BRANCHES

Once we started cutting down our branches, we began arranging them in our Vase.  This allowed us to see the height and width of the branches and see where we needed to take away excess or add extra to make our centerpiece feel balanced.  
 
NOTE: Because of the smaller opening on our particular vase, we did not need to use anything inside to hold our branches positioning If you’re not as lucky as we were, we suggest using foam board that you can wedge inside your vase and pierce your branches.

ADDING THE GREENERY

After we felt good with the positioning of our branches in our vase, we moved onto the next step: adding our greenery!
 
For this step, please note: We were going for a sparse vibe We wanted the main feature of our centerpiece to be these large elaborate branches, with sparse looking leaves. to give off a true Fall Season Look. Using Amber Interior’s Design aesthetic as our muse, and wanted to recreate that vibe for our centerpiece
 
TIP:  If sparse looking branches isn’t your mood, you can always add additional leaves until you feel its fuller and more to your liking.  There’s no real “rule” on this step.  Start adding your greenery / leaves, and continue until you feel its to your liking.

HOW TO SECURE YOUR GREENERY

For us, adding “less was more” and without moving the vase or removing the branches from the vase, we moved around our table, adding greenery leaf by leaf.  
 
To apply the leaves to the branch, we first used our wire cutters to trim off a smaller part of leaves from our main bunch.  Then, we secured our faux stem to our branch using our floral tape, wrapping the two together until firmly secured.  
 
TIP: You want the floral tape to conform/ blend with the branch as much as possible.  Doing this ensures your centerpiece looks realistic.

CAMOUFLAGING YOUR FLORAL TAPE

After we felt confident with the look of our leaves, we blended-in the green floral tape and branches.  Combining brown, black, white, and green colored paint, we used our art brush to mix together. Adding a bit of each color until it matched our branch, we then painted all the spots where we added floral tape. 
 
TIP:  To blend the branches with the floral tape, paint a bit past where the tape line ends.  Add a blend of colors to your brush and blot on top of your first coat to create a bit more texture and realistic look. 

OUR MASTERPIECE

The result?  One super cool, inexpensive, show-stopping, moody vibes dining table centerpiece.  (Say that 5 times fast!)  And thanks to Hobby Lobby 50% off floral sales, our only expense was the greenery at a whopping $12!

Of course, if DIYing isn’t your thing, you’re pressed for time, or you’d rather not get your hand dirty, here are some Dwelling Envy Approved faux branches that work great in replicating our design aesthetic.

**Please note this blog may contain affiliate links which means Dwelling Envy Interiors may receive a small commission at no additional cost to you!**

OUR FINAL THOUGHTS

For us, we are super happy with how this project turned out.  We found this WAY less time consuming and much easier to complete than our DIY Artificial Tree Project

And the best part?  Our centerpiece is truly a one-of-a-kind, unique designed piece that fits our style, is on trend for the season, and was a fraction of the cost!

What do you all think?  Share your thoughts, comments, and questions below!

If you liked this Fall Decor Project, be sure to check out our recent Fall Decor Must Have Blog Post, for Our Top 13 Dwelling Envy Must Haves for this Fall Season.  

Thanks so much for reading our latest post, stay tuned for next week’s post where we’ll be switching gears a bit,  ’til next time!

More
articles